Category Archives: Crafts

DIY Enchanted Forest Hallway

I looked at my hallway right around the new year and I says to myself: Self, that hallway really ought to be an enchanted forest! And so it shall be.

It’s a long, z-shaped hallway, with a narrow little bit that is just a connector between the front and back of the house. Because of the shape of the hallway, there are two long straight halls that stared at a blank wall. I read somewhere that putting a pattern on the wall you walk toward made a long hallway feel less … eternal, and that’s originally where I got the idea for the forest. Because I wanted an indoor forest with magical birds. Because who doesn’t?

I used this post as inspiration and as a starting point, but I wanted a) a light background with dark trees and b) some depth, so I added another layer of trees.

1) First, tape off the stuff that you don’t want painted. This lamp is going away eventually, but I needed it for now…especially because I haven’t bought its replacement yet.

enchanted forest1        enchanted forest 2

2) Paint your base coat. I picked my colors by going to Lowes and grabbing four colors in the same spectrum, a light bluish-gray/white, a light grey, a dark grey, and a so-dark-almost-black. But do better than us, and do the math. We’ve got tons of extra paint.

You can kinda tell that the wall color is different. Kinda. Trust me, it is; it went from peachy-beige to bluish-grey.

enchanted forest 3         enchanted forest 4

3) Tape some trees. I got some hefty use out of my blue tape over the next few days. At first I was following my inspiration post pretty closely, but then it became clear blue tape does not want to stick to heavily textured walls. So I did my best. I agree with her recommendation to flare the trunks of the trees out a little, but don’t go too crazy; you’re looking at the middle of the trees here, not the base or the canopy. Oh, and remember, this is the farther-away layer of trees, so don’t fill in all your gaps yet; you’ve got another layer on top of this, too.

For the branches, I taped kinda free-form. I overlapped the tape with the trunk, then cut away the parts I didn’t want. Remember that a branch must always be narrower than the trunk it branches off of, and branches get thinner the farther out they go.

enchanted forest 7 enchanted forest 6 enchanted forest 5

4) Cut out anything you don’t want. Like I said, I cut out the parts of branches that needed to connect to the tree. I started to follow the original poster’s suggestion of x-acto knifing the trees, but it was quickly clear that I was cutting the wall, not making much difference in the tree, and overall wasting my time. I’d skip that step. If you’ve got textured walls like I do, it really, really won’t matter anyway. Plus you can always touch it up later.

5) Paint! Fill in the trees with your lighter grey color. It took me two coats.

enchanted forest 9       enchanted forest 8

6) Peel off the tape and admire your handiwork for a moment. Look at the nice trees you have!

7) Tape more trees. By now, you’re a total pro at this. Remember, these trees are closer to the viewer, so they may be just a scootch bigger. Or not. Whatever, it’s your enchanted forest. Make your own rules.

enchanted forest 13       enchanted forest 12

8) Cut out the unnecessary bits and paint some more! You’re so good at this by now! Wow!

Remember, trees aren’t uniform, so let them flow, overlap, do what feels right. You’re using the darker paint for this section of “closer” trees, and you’re adding to the illusion by painting them overtop the lighter-colored trees.

It’s starting to look like a proper forest!

enchanted forest 15       enchanted forest 14

9) Get some bird templates. Now if I’d not been doing this on a whim, I might have planned ahead, but no, I didn’t, so I had to run out at this point and go looking for some nice bird templates. And then it turns out that there weren’t any flying bird templates, which is stupid, so you ask your husband nicely and he makes you one. Which is pretty sweet.

enchanted forest 16

10) Tape bird templates to the wall and paint! I made my enchanted birds gold, but pick whatever color you like. I discovered gold paint from the home improvement stores is stupid expensive. So forget it. Just go buy some cheap acrylic paint from the craft store. It’s like $2.

If you have flying and sitting birds, make sure you mix it up so the birds are kinda tastefully spread out. Or don’t, make a flock, that’s cool too! It’s your enchanted forest, after all!

enchanted forest 19       Enchanted forest 18

This…took a lot of coats of paint. Some as much as four. Just tape it, paint it, then come back an hour later and paint it again. I painted it in between loads of laundry.

enchanted forest 20      enchanted forest 17

11) Add bark details. Take a small paintbrush and your dark paint and add some swirls, swoops and swishes to your dark tree trunk. Then, if you’re like me, you’ll probably want some on your lighter trees, too. I mixed some of the dark tree color with the light tree color and wham: instant medium grey. Paint that on your lighter trees, and you’ve got a pretty nice forest.

enchanted forest 22       enchanted forest 21

12) Touch up and clean up. I didn’t like the pointyness of some of my branches, or the rough spots where the tape got weird, so I went in with pretty much all the paint colors and a small brush and freehanded details until they looked acceptable. But maybe you followed this guide flawlessly and did it perfectly the first time—awesome! Next up, take off the tape. It can be a little finicky, but peel firmly and steadily and you should be okay.

Then, enjoy your forest!

enchanted forest 24

I intend to buy a old-timey outdoor-lamp-lookin’ lamp for the fixture, and then I’ll paint in a light pole so  it’ll look a little Narnia-ish, but overall, I’m pretty happy with my enchanted forest. It’s definitely not in every house! 😉enchanted forest 23

2 Comments

Filed under Crafts

The Weirdness of Weddings

wedding paper flowersLast year, just after I got married, I was lonely, depressed, and trying to come to terms with what had happened in the wedding planning: two of my three bridesmaids dropped out of the wedding and stopped talking to me. I wrote up a piece about it, framing it not as a explanation (because I’m honestly not completely sure), but as a “how to” craft piece. The step-by-step craft process gave me a little emotional distance, and I thought it was kinda poetic.

I submitted it to APracticalWedding.com, a site upon which I’d relied heavily during wedding planning. This summer, they decided to publish it, which was pretty cool. Then it was republished by Refinery29—bonus cool!
But I’ve noticed something. Women, online and in person, respond a few typical ways:
  • “Well, at least you know who your friends are now?” or “Well, they just weren’t very good friends, were they?”
    I’ve gotten this from several commenters, as well as my mom and the therapist I briefly visited. You know how helpful this response is? Not at all. Because they were my closest friends, and their absence meant the utter dissolution of my friend circle. So, sure, I knew who my friends were: older friends, from college, who I rarely get to see. I had no “Let’s go see a movie” friends left.
  • “You shouldn’t have wanted such a hard craft project! Some people aren’t crafty!”
    Mostly received online, from people I think who didn’t understand that the craft was just a way to talk about it. For the record, they didn’t leave just over the craft. They ignored me about the craft, then were dismissive about it, didn’t offer ideas on dresses or like any of the ones I picked, and didn’t bother to RSVP to any shower invitations, didn’t come to my birthday party, weren’t available to meet for dinner, and then were upset when I asked for more support. I even said that if I was asking too much of them, I’d understand if they didn’t want to do the bridesmaid thing and they could just come to the wedding if that was easier. They, apparently, didn’t think so.
  • “I think we’re only getting one side of the story here.”
    Another from the commenters, and—well yeah, of course you are. That’s how a narrative works. This comment has a little added zing of implying I’m lying or manipulating the story. But, if it helps, I don’t know any more, really. They never said why, exactly, they were dropping out. They never said anything at all, except one half-hearted “I’m sorry things turned out this way” a week later, before dropping off my Facebook friends list and not talking to me again. One changed her username so I can’t search for her.
And that would be it, except a few men I know read my article, too, because I forgot who can see things I post to my personal Facebook page. And this is what they said:
  • “Wow, did that really happen? I’m sorry. That’s really shitty.”
    And that was amazing. Because the majority of the women who responded hadn’t given me that kind of empathy. These men validated my experience and just let me say, yes, that was a thing that happened. It was shitty. They didn’t blame me or accuse me of being a “bridezilla” (more than one woman has made that suggestion—including the therapist). They didn’t tell me they weren’t crafty. They didn’t try to play it off as no big deal.
I think it says a lot about women and weddings. The women are afraid to admit that something like this could happen to them, that weddings aren’t always the Hollywood ideal of being so popular you have to be in 27 weddings. So they look for “if only’s”—”if only I don’t do that, it won’t happen to me.”
I didn’t have a Hollywood wedding experience. Parts of wedding planning were really, really shitty. I don’t think I “deserved” what happened, and it’s taken me a long while to stop feeling as hurt about it; it was hard to mourn those friendships. But I did have a lovely event, in the end, with lots of dancing and happy people. I married a really amazing man, and we’re building a solid life together.
Plus I have this kickass wreath, so that’s cool.
paper flower wreath

4 Comments

Filed under Crafts, Feminism

Literary Horrors

I had the hardest time coming up with a Halloween costume this year. I wanted something at least a little offbeat, but of course you want to be semi-recognizable, too, otherwise, what’s the point? (True story: I went as a “Freudian slip” one year—a slip worn as a dress, decorated with Freud’s face and a bunch of psychology sayings—and it was a total disaster because no one could tell what it was. I’d put a lot of work into it, too!)

But I’m also behind and it was so close to Halloween that I didn’t have the time or the energy to sew something from scratch. And the pre-packaged ones are decidedly not appropriate for most locations.

But then a friend mentioned her idea, and it was so utterly brilliant I stole it (with permission. We live in different parts of the country, so it’s ok). I’m going as “the girl with the Green Ribbon.” It’s from a children’s book, “In a Dark, Dark Room and other Scary Stories.”

Here, have a listen if you don’t remember it:

I remember the book, vaguely, but I also think I heard it as a campfire tale. It’s perfect: it’s creepy, not too hard to do, work-appropriate, and—bonus!—literary. I’ll be wearing a Victorian-ish dress with a green ribbon around my neck, and a bit of makeup to make me pale, pale, pale, perhaps with a bit of bonus blood ichor seeping around the ribbon. (I’ll try to post a picture after I’ve got it all compiled.)

So what are you going as? Also, bonus points, let’s come up with some good literary horror/costume ideas for next year.

Perhaps:

  • The Cat in the Hat (cat costume + striped hat and bowtie)
  • Carrie, from Carrie, of course (white dress covered in blood dye + blood makeup?)
  • Harry Dresden, The Dresden Files (black trench coat + wizard staff)
  • The Velveteen Rabbit (rough-around-the-edges rabbit costume & tissues because you’ll make everyone cry)
  • Snow Queen from Narnia (though this year you’ll probably get confused with the Frozen crowd)
  • Pride And Prejudice and Zombies (what’s better than undead literature?)

(You know, it figures that I would come up with all these ideas only after I’ve got a costume figured out…)

Leave a comment

Filed under Crafts, Reading

Making a Book, Literally

How to Make Your Own Hardcover Book

This is just neat: this man on Reddit made his own book, in a very literal sense. He has good reason for not buying it: it is originally in a different language, without an official English translation. But he procured the English version and wanted to keep it on his shelf. Ta-da, build-your-own-book!

The process is both complicated and relatively simple. It looks time-consuming, but that shouldn’t be a barrier to anyone who is really passionate about the idea.

The steps essentially are:

  1. Acquire text for book. Print it out on good paper.
  2. Fold printed pages into “signatures” (folded-in-half sections).
  3. Measure where the stitches for the binding should go.
  4. Poke holes into each signature. Looks time-consuming.
  5. Sew the signatures to each other. (Careful about keeping those suckers in order.)
  6. Put glue on the outside edge of the stitched pages. Let dry.
  7. Trim and sand down rough edges on the pages.
  8. Acquire old hardcover book you don’t want; remove the cover (you could also make your own. See Pinterest).
  9. Add cover pages and any other details to your text.
  10. Recover your new book cover.
  11. Glue in the pages.
  12. Enjoy!

Leave a comment

Filed under Crafts, Publishing

How to DIY a Flower Centerpiece

Happy Spring!

If you’ve got some time on your hands and a hankering for some faux flowers in the house, have I got a craft for you! Now you, too, can be the owner of a floral ring centerpiece.

How? you ask. Well sonny, I certainly don’t mind telling you.

DIY floral circle- gather supplies1. Gather supplies: You’re going to need a hot glue gun (not pictured), a foam ring, scissors, ribbon*, and silk flowers in different sizes. The ribbon is optional, but I liked it. I bought the floral ring, orange flowers, and ribbon at Dollar General for….$1 each. (The yellow flowers were a gift.)

Get more flowers than you think you’ll need, in complimentary colors and different sizes. I can’t tell you how many to buy, because that will depend a lot on what kind of flowers you pick and how big a ring you make. Buy a stem or two extra.

Here I’ve plucked all the flowers from their stems, leaving just the little nubbins at the base. You may need to cut them off with scissors or wire cutters, but try just yanking them off; mine came off easily.

DIY floral circle- hot glue

1A. Hot glue ribbon– If you decide to add ribbon to your floral ring, you’re going to need to apply hot glue in a line along the bottom edge of the ring. Then just gently spool out your ribbon all along the bottom.

DIY floral circle-add ribbon

The ribbon may not show on the final product, but I like it as a “finishing” piece just in case someone does peek at the lower portion. DIY floral circle-Finished ribbon

This is what it looks like. ^^

1B. Glue Leaves on Inside– Another optional step that just adds to the finished look. I glued the leaves from my sunflowers to the interior of the ring, just so there is something covering the foam. Not a necessary step, and you could wait until the ring is otherwise complete to see if you want this.

DIY floral circle- Glue Leaves

Just add a short line of hot glue and stick on a leaf until the inner ring is more or less covered. It doesn’t need to be perfect. Remember, this will most likely not be seen.

DIY Floral ring

2. Start adding flowers.  Take your flowers and stick the nubbins into your foam. Press gently but firmly and they should slide right in without much resistance.

DIY Floral ring- place flowers

This lets you get a sense for how it will look in the overall ring. At this point, you can either place all the flowers until you’re happy with them, or you can do them one by one. I do them one by one for this tutorial.

You can place them at a slight angle, or straight down into the foam. I recommend having a little bit of diversity: nature isn’t precise, so having them perfectly uniform will actually look a bit more unusual than having them a bit oddball in placement.

DIY Floral ring- glue flowers

3. Glue Flowers. Now that you’ve decided how you would like to arrange your flowers, gently pull them out of the ring (one or a few at a time) and apply a dot (or swirl) of hot glue to the nubbin. It doesn’t take much. Then, push the flower back into the hole you removed it from.

DIY floral ring- place flowers

The hot glue will hold the flower in place better than the foam alone. You can skip this step if you’re confident your flower ring won’t be moved around much and you only want it temporarily.

DIY Floral ring- top ring flowers

4. Fill in the Gaps. Fill in your flowers all along the foam, making sure to mix up the color and type of flower. This is more art than science; go with what feels good! You mostly just need to cover the floral foam, so if that means squishing the petals a little, that should work. Don’t feel obligated to make it too cramped. This is also why you are placing the flower before you glue it; you can switch them out if you don’t like the placement.

DIY floral ring - side flowers

I did the top first, then went around the side of the ring. My flowers were large enough that I only needed one flower to fill the side; your results may vary. Do whatever works best for your project.

DIY Floral Ring- Complete centerpiece

5. Enjoy! Your floral ring is a good centerpiece all by itself, or you could add a candle or tall vase to complete the look. (Note: if using candles, be careful to keep the flowers well away from flame! I recommend using a glass vase rather than an exposed wick.)

DIY Floral Ring with Candle

1 Comment

Filed under Crafts

How To Make Paper Roses

Because I am a foolish and cheap person, I am making paper flowers for my wedding. For what? I’m not sure exactly; I just know I want them. For centerpieces, for bouquets, for boutonniere, for whatever.

But they are $7 each to buy! (Though there are some really beautiful bouquets for sale on Etsy, if you’ve got more money than time).

I have a dictionary I rescued from a trashcan, and I like crafty things anyway, plus I figured making paper flowers would be a good way to get to do wedding things in the months before I could do anything practical.

As it turns out, it’s good that I started early. That $7 isn’t for supplies or difficulty: it’s for TIME. These suckers just take awhile. I can typically make two or maybe three during a movie; that’s about 30 to 45 minutes per flower.

So if you are brave, have some time on your hands, and want some cheap but pretty decorations, here is how to make them (cobbled together from several online tutorials and my own screw-ups).

1. Gather Supplies

Paper Flowers- Gather Supplies

I have my dictionary (circa 1970, a very good year), floral tape, scissors, Tacky Glue, and floral wire. I bought the Tacky Glue, floral wire, and floral tape at the craft store for less than $5. You could probably use Elmer’s glue or something similar instead, but this is NOT a craft for hot glue unless you have very burn-resistant fingers. Tacky Glue works great and dries pretty quickly.

With just these supplies, you’ll be able to make 30 flowers with stems. (You could make far more if you just need short stems).

2. Cut Out Petals

Paper Flowers - Cut Petals

You’ll want petals in about 4 sizes: itty bitty; sort of roundish; large; and giant. They look sort of like Hobbit-hole doors or church windows. For the littlest ones, you’ll want the flat bottom bit to be at least 1/4 of an inch or you won’t have enough paper to work with. The big ones can be up to 3 or 4 inches, but you need them to be less wide at the base; anything more than an inch, inch and a half or so gets really unwieldy.

I don’t use a template, and I don’t really think you should either. Some oddity is useful for a project like this, and makes them look more like real flowers. Just get a range of sizes and you’ll be set.

Paper Flowers - Petals with Curls

I find I work best conveyor-belt style, so I cut out all the petals first. You’re going to need more petals than you think you will, so just make a bunch. With thin dictionary paper, you can cut out 4 pages at a time; just stack them together and cut away. I prefer to cut from the bottom edge and work up, so all my words are left-to-right, but this really doesn’t matter in the end. It’s just easier for me.

3. Crumple

Paper Flowers- Crumple

Now that you have painstakingly cut out all those petals, you need to crumple them up. Take a few in your hand at a time and wad them up into little balls. Then uncrumple them a bit. You want your paper to be wrinkly; it makes the flowers look a little more realistic (trust me, it really does). I find it useful to sort of push the petal into my palm with the thumb of my opposite hand because this gives them a bit of a natural curve, but as long as you crumple them up, it doesn’t matter much. Crumple, then smooth out again.

4. Roll Edges

Paper Flowers - Roll Edges

Now that you have crumpled them, you’re going to gently roll the edges back. Just the top, and for the smaller ones you may just make one roll; use your judgement. To roll the edges, I just fold the desired edge over a piece of floral wire and roll it between my fingers a bit until it takes the curl. This becomes the BACK side of the petal, the side that will face out.

Paper Flowers - Lots of Petals

Do this on all your petals. See how they lay differently now? They’re a tad more dynamic.

5. Prepare Your Floral Wire

Paper Flowers - Floral WireOk, so your petals are complete: now it’s time to get your floral wire ready. If you’ve got the long kind like you see here, bend it in half, then cut with your scissors (it make take a bit of work, but it’s doable). Bonus points if you have wire cutters.

Paper Flowers - Bend WireThis is an important step, one that I didn’t find in other tutorials! If you may be moving your flowers around at all (or, um, if you have cats like mine who will immediately pull any flowers out of a vase), you need to now put a little loop in the top of your wire. Just bend the pointy bit down on your newly shortened piece and fold it into itself. It doesn’t have to be very big at all; you’re just making a place for the petals to “grip” so that when you drop your flowers (or your cat knocks them all off the counter), you don’t also lose your bud off its stem.

6. Glue On Petals

Paper Flowers - Wrap PetalsTime to glue on your petals! Start with a dot of glue on one of your small petals. You’re going to place your wire loop right in that glue dot and then fold the petal over it, left to right. Basically just pinch it. Count to three. Your Tacky Glue should then be dry enough for you to keep going.Paper Flowers - Add More PetalsIn order for your rose to look like a real flower, you need to alternate your petal “start points.” Basically, don’t stack them all up behind each other. At this point, the project is less science than art; just do what feels right (bonus points if “what feels right” is a Fibonacci sequence, like in nature. I…am not that good).

Work small to big, using just a bit of glue on each petal. When you get to the bigger petals, your dot of glue will be some a thin line–just run your glue along the bottom, then pinch it around. Keep going until you feel like your flower is flower-like. Like this:

Paper Flowers - A Rose By Any Other Name7. Tape It Up

Next, you’ll need your floral tape. Cut yourself a piece about an inch and a half long.

Paper Flowers - Floral TapeThe tape should be slightly tacky but not actually sticky at this point, and it should be pretty easy to roll off. Cut it with scissors; tearing it is hard (on purpose).

Paper Flowers - Tape the StemYou’re going to pinch your floral tape at the base of your rose. You’ll then slightly pull on your floral tape, causing it to stretch and become sticky. Wrap it around and slightly up onto the paper. This, for our horticulturalists in the crowd, will be how you make your sepal calyxes (everyone else: this is the thick green bit at the bottom of your flowers.)

Paper Flowers - Completed StemIt should look kinda like that. It will be thicker at the top, and naturally thin out toward the green floral wire.

8. Ta-Da! You’re Done!

Paper Flowers - Completed BunchStick ’em in a vase and enjoy them! You may find the stems don’t “sit” well in the vase; the paper can be a bit too heavy. I just twist several wires together and that holds them in pretty well. If you’re using them for display, you could now put in some pretty stones or otherwise camouflage the floral wire, but mine are only temporarily in a vase, so this is perfect for me!

Good luck on your paper flowers! Let me know what you use them for.

5 Comments

Filed under Crafts

5 Reasons Writers Should Bake

It looks nothing like store-bought, and tastes a million times better.

It looks nothing like store-bought, and tastes a million times better.

I’ve started making my own bread recently, and I think I’m in love.

Actually, my new fascination with bread-baking is Neil Gaiman’s fault. It’s true; my new obsession with warm homemade bread comes straight from a literary master. See, at his reading/signing event, he read from “The Ocean at the End of the Lane” and, as a special twist, from “Fortunately, the Milk.” By coincidence (or…design?) both books mentioned the incredible deliciousness of homemade bread. There’s a whole riff in “Ocean…” about how bread is “supposed” to taste like nothing, and the little boy is dismayed by the flavorful loaves his father brings home.

So I decided I wanted to get some flavor myself, because Neil Gaiman said so.

It turns out there is something better than sliced bread–a loaf straight from the oven, still warm when you take a bite. It’s amazing, I swear.

Everybody should try it. But I think it might be extra good for writers. Here’s why:

5. Fight Carpal-Tunnel

I spend way too much time at a computer, and so far I have refused to pick up one of those dorky wrist-rest thingys. I’m basically begging for carpal tunnel syndrome. But I don’t have any fancy baking supplies: I’m making these suckers by hand. Kneading dough is a great workout and great stress-relief. I mean, the recipe literally calls for you to “punch it.” Don’t mind if I do.

4. Time to Think

Studies of creativity have found that we do our best thinking when our minds can wander a little bit: that’s why all the best ideas show up when you’re on the can (or did, before smartphones were everywhere–that’s right, I know about your texting-while-pooing habit!). When you bake bread, your body is engaged but you don’t have to think about much. Let yourself get creative.

3. It’s Easy

I’d heard a lot of whining about bread being hard to do. Totally not true. There are about a gazillion recipes online, so you can find a flavor you like. It may take awhile, but–here’s a secret–most of that time you aren’t actually doing anything. You’re waiting while the loaf rises. While you wait, go do something else! Just set a timer and wash your hands when you get back. I start a loaf, then go clean my kitchen. By the time everything is spotless, it’s usually time to knead the loaf. Easy.

2. It’s Research

Bread is ubiquitous in stories (Note: If someone finds a recipe for Lembas, let me know). Once you know how it’s done–and how a good homemade loaf really tastes–you can transfer all those experiences right to your character. Since just about everybody has or does eat bread, it’s a pretty universal experience.

1. It Tastes Amazing

Ok, not writer-specific, but damn. It’s like I’ve never really tasted bread before. Everyone should have that experience. (Much like in writing, the quality of the original materials matters. Use good ingredients and follow a recipe and you’ll get a good result).

Eat up, scribblers! If you’ll excuse me, I think I need (another) slice. Yum.

2 Comments

Filed under Crafts, writing

Killer Craft: Build Your Own Zombie

Gorgeously Gruesome Zombies
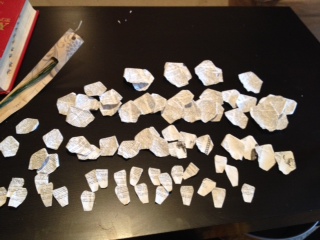
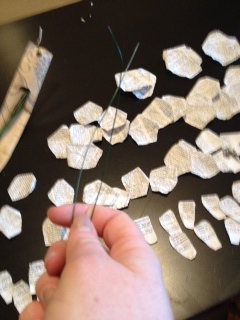
My grandmother is the perennial thrift store shopper, and periodically she finds something wonderful and weird. This time, I was the recipient of her bounty: my very own Gorgeously Gruesome Zombies kit!

Basically it’s a little craft booklet with instructions and templates on how to make 8 plushy “zombies” (they’re kinda liberal with what constitutes a zombie, though, thus the quotation marks. Personally I don’t think a construction cone should qualify. Nor a caterpillar, though I guess that’s scary-ish?)

But it combined two awesome things! Crafting + zombies = fun, right?

So, for your viewing pleasure, my very own DIY zombie, in step-by-step process.

First, prepare your supplies.

Assemble Supplies

Second, read the section on the “zombie kid” and discover it doesn’t include all the supplies you’ll need. Be annoyed but grateful you have a ridiculous assortment of scrap/craft supplies.

Read Instructions

Third, trace templates from back of the book and then pin to felt.

Zombie Templates

Fourth: Cut out clothing and body parts. Feel ghoulish.

Body Parts

Fifth: Build your little Frankenstein’s monster body with the help of craft glue. He’s a spiffy chap.

Construct Body

Sixth: Sew monster’s front to his back. Be annoyed that he’s apparently wearing body paint clothes as his back is flesh-colored (grey). Add some blood to his stumpy arm.

Sew Em Up

7: Tell your zombie to stuff it.

Stuff It

8: Make a face. Ignore weird instructions to apply gross eyeball after head is complete and do it now because it makes way more sense. Be squicked out by the dangly eyeball. Love your zombie even more. Make a Face9: Sew him up.

Sew Him Up

10: Make sure he has a fat head.

Fat Head

11: Make a hat! Wish you also had a dashing red top hat of your very own. Be jealous of your zombie creation. A Hat!

12: Attach head to body. No Neck

13: Make him fancy.

Fancy Zombie Creation

14: Electrify.

Just kidding. Don’t add electricity to your zombie. It won’t work, anyway. They’re undead by nature.

Do store your zombie in a safe place to keep your cotton-stuffed creation away from your BRAIIIINS….

1 Comment

Filed under Crafts